How to Draw a Straight Line on a Floor
How to Use a Chalk Line to Mark a Straight and level Line on a Wall, Floor or Other Surface to use as a Guide
In this DIY how-to guide you will learn all about the chalk line. We will show you how to correctly fill the chalk box with chalk, coat the line in chalk and then use the chalk level itself to mark a clear and defined line on to a wall, floor or other surface so that you can use it as a guide when fixing timbers, tiling floors and walls, wallpapering and many other jobs.
When fixing timbers around the top of a wall or other surface to form a ceiling or other structure, it is essential that they are all straight and level; this is no easy task.
If you aren't lucky enough to have a laser level (find out more about laser levels here) then one method is to measure up from the floor and mark at regular intervals at the required height and then join all the marks up with pen using a straight edge such as a spirit level.
This may seem like a good solution, however it isn't ideal as there is plenty of margin for error.
In the building trade there is a tool for every possible job and this scenario is no exception.
The weapon of choice in this scenario is the chalk line and to these ends, in this DIY guide you will learn how to use a chalk line to mark a level horizontal line on a surface.
What is a Chalk Line?
When it comes to the question of what is a chalk line, the answer is really in the name; it's a line covered in chalk!
On a basic level, this is exactly what it is but as with most things, there's a little more to it than just a piece of string with some chalk on it.
The chalk line tools itself is a highly versatile tool and can be used to mark a perfectly straight line on pretty much all surfaces for pretty much any job that needs a straight line to follow e.g. laying both floor and wall tiles, roofing work, wallpapering and more.
The main body of the tool or "chalk box" is essentially a container for the chalk. Within the main body, along with the chalk, is a shaft and the line is wound around this via the handle on the outside.
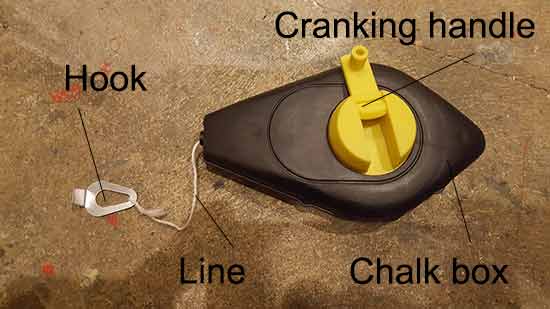
The chalk line in all its glory
When the string or "line" is wound back into the body, it sits in the chalk allowing the chalk to fully cover it so that when it is pulled out, it has a suitable amount on it to allow a clear line to be defined on the surface you're working with.
Tied to the end of the line is a hook (or claw as it's also sometimes known). This has two jobs; firstly to allow you to hook it on to a fixed object so that you can create your line and secondly to prevent the line from disappearing inside the chalk box.
One question you may be asking yourself is: if I'm marking a line, should I use a chalk line or a laser level? This is a valid question indeed and in answer, it really depends, they both have their pros and cons.
If you are lucky enough to already have a laser level, then great, certainly make use of it!
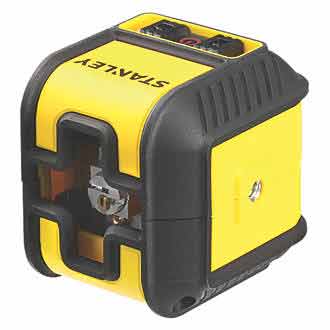
Stanley Cube laser level
On the other hand, if you don't then certainly do not rush out and buy one. They are expensive pieces of kit (ranging from £50 up to nearly £1000!) and if you only need to mark a few lines now and then, it will be a massive waste of your money.
If you have neither tool then you should certainly go out and but a chalk line. For the cost of around £5 you can get yourself a chalk line kit that should contain the line itself and enough chalk to cover all of your marking needs for a good long while.
To summarize the above, when used correctly a chalk line will produce a clean, crisp line that's every bit as good as that produced by a laser level, for a fraction of the cost. So if you need a general purpose line marking tool at home, a chalk line is your go-to solution!
What Colour Chalk Should I use?
When it comes to the color of chalk you should use this will really depend on what you are doing.
In terms of colours and types available, you have four choices. Here follows a list of the colours available and what they should be used for:
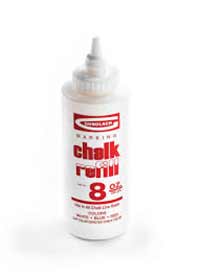
- Red Chalk: This is the most durable type and should be used when working outside or in conditions where your markings are going to be subjected to all types of weather or other elements that could easily wash away or quickly degrade them. It is the most hardwearing of the colours

Red chalk line chalk
- Blue Chalk: The general purpose choice. Blue chalk can be used on all surfaces and in any environment
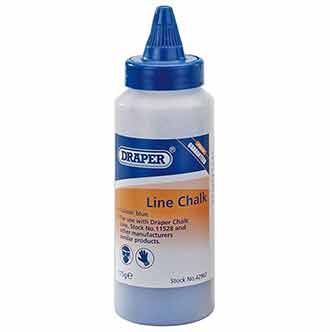
Blue chalk line chalk
- White Chalk: This type should be used for any interior work such as painting, tiling or wallpapering. It's easy to remove and should not bleed through any top coat finishes
White chalk line chalk
- Fluorescent Chalk: This type is best used in low-light conditions or on surfaces that may not otherwise show other colour choices clearly enough to follow easily
Fluorescent chalk line chalk
How to Fill the Chalk Box
If you have just purchased a chalk line, before you can actually get started with your marking out, you are going to need to fill your chalk box with chalk.
If you have a new chalk bottle that has not yet been used, you will probably need to snip the very top off of the spout or remove any film or cover from the bottle cap.
The bottle we are using has a handy twist cap that opens and closes the nozzle so check this before you chop anything off.
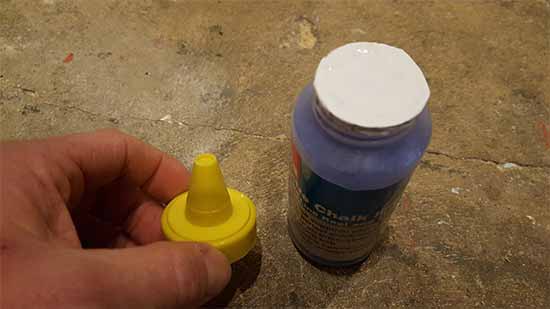
Chalk line chalk bottle with twist open nozzle
Once done, the next job is to pull out 3 metres or so of the line from the chalk box. Be careful when pulling it out as it can easily get tangled up, causing a right headache getting it all straightened out again.
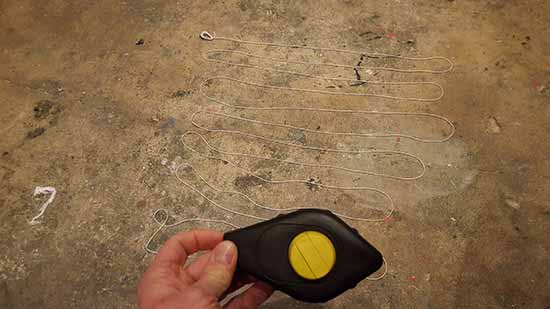
Chalk line pulled out of chalk box ready for coating in chalk
With your string now pulled out, on the body of the chalk box itself there should be a filling cap somewhere (this can sometimes also be a sliding door). Unscrew the cap or slide the door open to expose the inside of the chalk box.
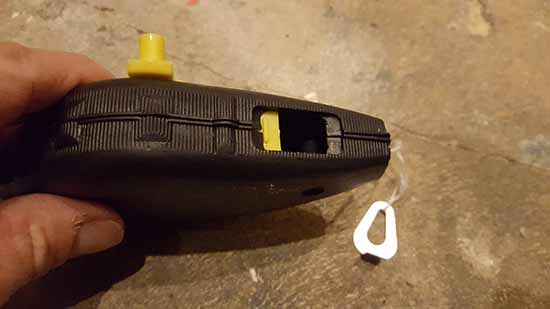
Chalk box filling hole
Insert the spout of the filling bottle into the filling aperture of the chalk box and give the bottle a gentle squeeze to force some chalk in.
Do this gently as you only want to fill the box about half way. Additionally, shake the chalk box now and again to level the chalk that's already in there so that you know when to stop.
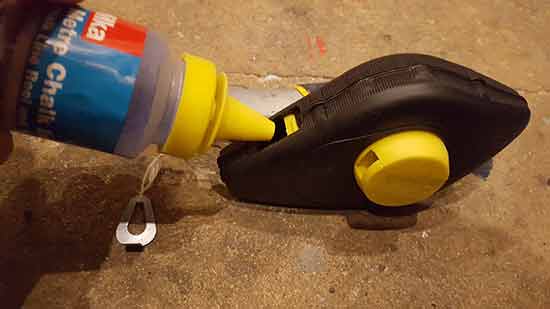
Filling the chalk box with chalk from the bottle
With your chalk now present in the box, gently wind the string back in, ensuring it doesn't get tangled. As the string is retracted, it will get pulled through the chalk giving it a good coating.
It's well worth repeating the above steps 2 or 3 more times adding a little chalk each time (but not too much, you definitely don't want to fill the chalk box all the way up!). This will ensure your line is fully coated and will produce the best markings possible.
How to use a Chalk Line to Mark a Straight Line
With your line now fully primed with chalk, it's time to get marking!!
Mark Each end of Your Line
The first job is to make two marks at both the starting point and finishing point of your line so that you have two points to run your chalk line between
You can either measure up from the floor or down from the ceiling the choice in yours, but before you do, make sure which ever surface you're using is level.
For the purposes of this demo we will be measuring up from the floor. Use a spirit level to check this. In this case it's level, but if it wasn't you would need to lift the level until it's level and then use a tape measure to measure the difference.
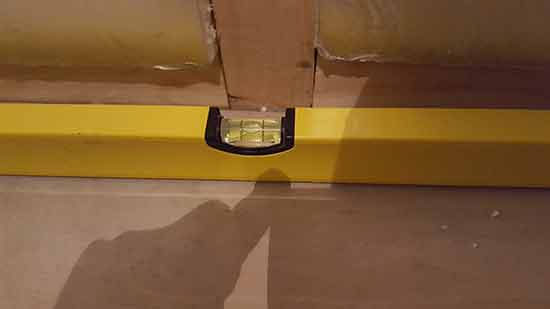
Use a spirit level to check the level of the floor
Once you know how much out of level it is you would then need to add this amount to the end that is off level to ensure that both marks are indeed level.
Measure up from the floor at either end and mark each point with a pencil.
Measure and mark your starting point
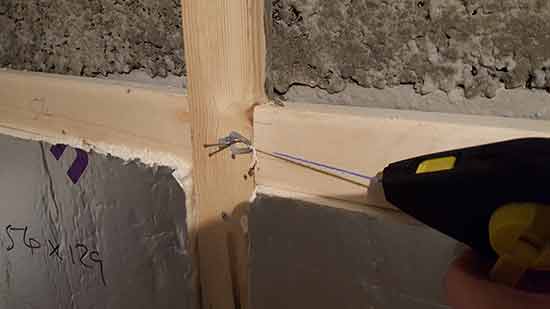
Add a Nail or Screw
To ensure that your line is totally straight, the chalk line itself needs to be pulled tight. To ensure it stays tight you will need something to either hold the hook end on your mark, use the claw on the hook itself to pull against or hook the actual hook over something.
In tis instance we have knocked in a nail at either end so that we can hang the hook at one end and then at the other, lever against it to pull the line tight.
If you needed to free both hands up, using this method you can wrap the line around the end to keep it tight.
Before you secure the chalk line and get it tight, slip one end over your nail or screw or hold it on your mark and pull it out of the chalk box at an angle away from the surface you're marking and give it a slight "twang".
This will get rid of any excess chalk and give you a much sharper line on the surface you're working with.
Nails added at the start and finish marks for ease and to ensure line stays as tight as possible
Snap Your Line
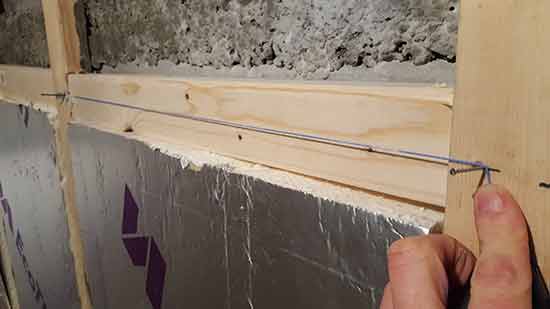
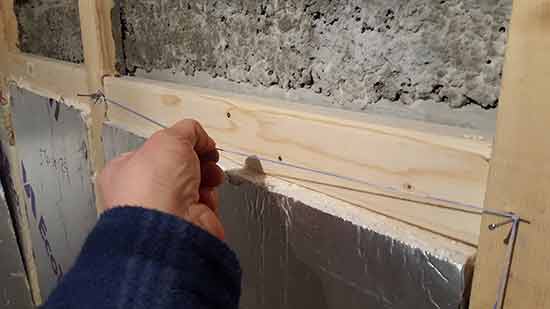
With your marks made and fixing points ready, slip the hook over your first nail and pull some line out of the box, pull towards your second nail, keeping the line as tight as possible.
Line hook hooked over nail to keep the line tight and in place
As you move towards your second nail, pull the line slightly diagonally to keep it away from the area you're marking to avoid getting any excess chalk on the surface.
Secure the line at your second fixing, ensuring it's as tight as possible. Push the line down to the base of each nail or screw so that it's as close to the surface as possible.
With everything ready, using your thumb and finger, pull the line out around 100mm (4 inches or so) roughly around the centre point between you're two marks.
Line pulled out and ready for snapping
This will ensure an even amount of down force with the snap and ultimately a crisper, cleaner line.
If you want to get your line as defined and bold as possible, give it two or three snaps.
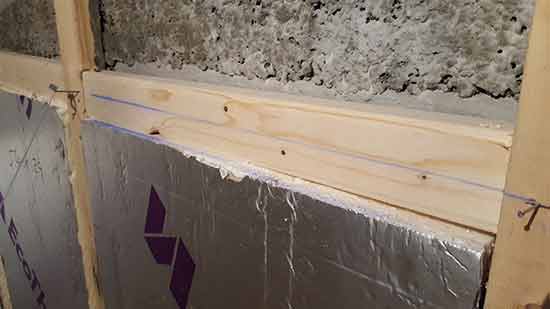
Line snapped and chalk line marked on to surface
If you are creating a line over a long distance, this can be challenging as the longer the run, the tighter the string needs to be.
A handy trick here is to get the line as tight as possible (but not too tight as it may snap) and then find the rough centre point.
Once you have found this, put your finger over it and push down, holding the centre point tight to the surface.
You can then individually snap the left and right sides that should then give a sharper line with much less risk of the line straying away from level.
Cleaning off Chalk Line Marks
Once you have fixed your items in place and no longer need your chalk line, ideally, you would want to remove it.
In reality, this can be a bit tricky, especially if the surface is porous, as pretty much all colours of chalk are semi-permanent, although all apart from the red type can be scrubbed off to some degree with water and a tooth brush or other stiff brush.
As we have mentioned above, if you do need to ensure any chalk lines can be gotten rid of as much as possible, opt for the white chalk.
If you are working on a non-porous surface you do stand a much better chance of removing the line as the chalk is somewhat prevented from being pushed down in to the surface, giving you a much better chance of getting it off.
Maintaining Your Chalk Line
When it comes to any maintenance, the chalk line is a pretty basic tool and doesn't require much.
The only real repair that it may require is if the line itself starts to fray, in which case the damaged section can be cut off or if it snaps.
In either situation, all you would then need to do is to re-attach the hook to the remaining section.
If you are working outside then the chances are that the line will at some point, get wet. As I'm sure you know, water and chalk don't mix very well.
If the chalk gets wet it will turn into a paste, rendering it useless.
In this case all you need to do is pull the line out fully and leave it to dry. Once dry, it can then be wound back in.
If the chalk in the box has become wet then it will need to be removed. Most chalk boxes will allow you to separate each side so that you can access the internals (this is how you can also change the line if needed).
With the box cracked open, clean out all the old chalk and dry it thoroughly. Once done, you can then put it back together again and refill it.
Using a chalk line to mark a straight line on to a surface is a fairly easy job and in most cases, the more you use your chalk line, the more uses you will find for it.
All project content written and produced by , founder of DIY Doctor and industry expert in building technology.
How to Draw a Straight Line on a Floor
Source: https://www.diydoctor.org.uk/projects/Usingachalkline.htm
0 Response to "How to Draw a Straight Line on a Floor"
Enregistrer un commentaire